Whether you’re a newbie or a pro fishkeeper, you will need some type of filtration in your aquarium to keep the water moving and clean. Choosing a filter can be kind of an intimidating thing as there are so many different types and a whole bunch of brands of aquarium filters.
What do aquarium filters do?
The main function of an aquarium filter is to keep the water clean and maintain the right water condition. Mainly there are three kinds of filtration called,
- Mechanical filtration
- Biological filtration
- Chemical filtration.
Aquarium filters not only clean the water but also keep the water moving by increasing the dissolved oxygen level of the water.
Mechanical Filtration
This is the process of straining out the suspended debris from the water. Normally sponges, wools, and filter pads are used as the mechanical filter media.
Biological Filtration
Biological Filtration is a natural process in any aquarium that converts toxic substances like Ammonia into Nitrate which is less harmful to the fish. This process is also known as the Aquarium Nitrogen Cycle and it is a must for any aquarium to maintain the right water condition.
Aquarium Filters as a Breeding Ground for Beneficial Bacteria
Denitrifying Bacteria, which are also known as beneficial bacteria, are the key component of the Aquarium Nitrogen Cycle. As we discussed in our Tank cycling guide, these beneficial bacteria grow on tank surfaces. So the bio-media in filters provides an excellent breeding ground for these bacteria.
Chemical Filtration
This is a chemical process that can filter out medications, tannins and other harmful impurities from the water. Normally activated carbon, and some other resins are used for the chemical filtration in aquariums.
Aquarium Filters for Water Circulation
Water movement is the other critical function of a filter that helps to keep a healthy aquarium. How do fish breathe underwater? Normally, their gills pick up dissolved oxygen in the water and then expel carbon dioxide.
Oxygen doesn’t just magically appear in the water. It enters the water from the surface. Also, the expelled carbon dioxide should be released through the water surface. This is what you’ll hear fish keepers refer to as the gas exchange.
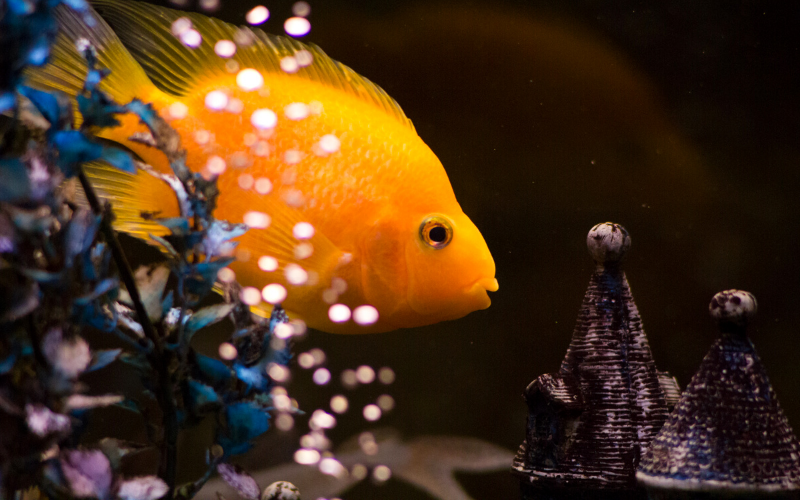
The problem is that the gas exchange slows down drastically in stagnant water. Because if the water is still, there’s nothing to speed up the gas exchange. So there will be a very little amount of oxygen coming in and very little carbon dioxide going out.
Aquarium filters do an important job by providing water movement, which is vital to maintaining the right amount of dissolved oxygen in the water.
Types of Aquarium Filters
Let’s dive in to see what are the 6 different types of aquarium filters. How to install them? How to maintain them? What are the pros and cons of those aquarium filters?
Sponge Filters
Sponge filters are one of the easiest filters to use in the aquarium. They don’t have any moving parts, and they’re a lot more efficient than you might think. Normally sponge filters are recommended for small and medium-sized tanks.

How to setup Sponge filters
First, an air tube should be connected to the relevant fitting of the sponge filter. Then hook the other end of the air hose to an air pump.
When the pump creates bubbles, they naturally go up through the tube of the sponge filter. So It creates a current which draws water through the sponge and catches loose debris.
Maintenance
Maintaining a sponge filter is super easy. All you need to do is fill up a bucket with the existing water from your aquarium, put the sponge in there, and squeeze it out. Then just stick it right back in the tank.
Pros and Cons
As the concept of a sponge filter is very simple, you probably think it wouldn’t be efficient enough. But actually, they’re incredibly efficient. Its sponge can catch almost all the debris just like any other filter does.
Just being a giant sponge, they’re great for providing a ton of surface area for the growth of beneficial bacteria. Also, air bubbles from the sponge filter make the water move throughout the tank.
If you’re worried about power outages, it’s not a problem anymore with Sponge filters. If you have a battery or a USB-powered air pump, simply connect it with your filter air tube.
The only con of sponge filters is that they take up valuable space in your aquarium and sometimes look ugly. So finally, Sponge filters may not be the most attractive choice of filters, but they’re super easy to install, a breeze to maintain, and incredibly efficient.
Hang On Back Filters (HOB Filters)
The Hang On Back filters are exactly as they sound. It is a box-type filter installed on your aquarium’s top edge. The Hang On Back Filters are the most commonly used filter in small and medium-sized aquariums.
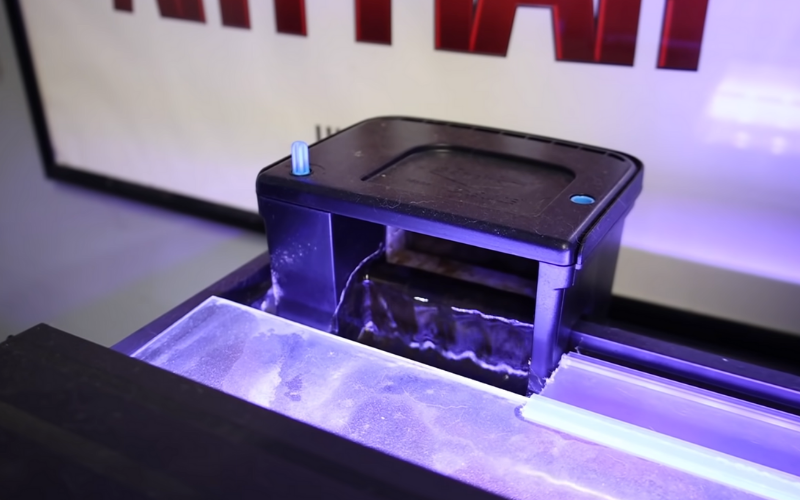
How to Set up the Hang On the Back Filters
They draw water in through the intake pipe and bring it into the box where the water is processed by the filter media. Then the filtered water is sent back out into the tank. Most of these filters are designed to be easy to install and maintain.
Filter media comes in either the form of a disposable cartridge or simple trays that can be lifted out. So installing them is usually just a matter of hanging the box on the tank, inserting the intake tube, placing the trays or cartridges in and finally plugging it in.
Maintenance
Maintaining a Hang On Back Filter is ridiculously easy. Most of them are as simple as removing the cartridge and installing a new one. You can also remove the box from your aquarium and dump it out to get all that nasty stuff out of there.
But the caution is there are a lot of beneficial bacteria in your filter that are vital to your aquarium`s health. So don’t wash all of that away. If you see a huge buildup in your filter, just dump it out and reattach without scrubbing.
Pros and Cons
Hang-on-the-back filters are a step up from sponge filters. With the help of the backbox, It allows you to add things like ceramic rings, bio balls and filter wool. Some types of bio media will also contain activated carbon which is just another thing that helps to keep the water clean and not smelly.
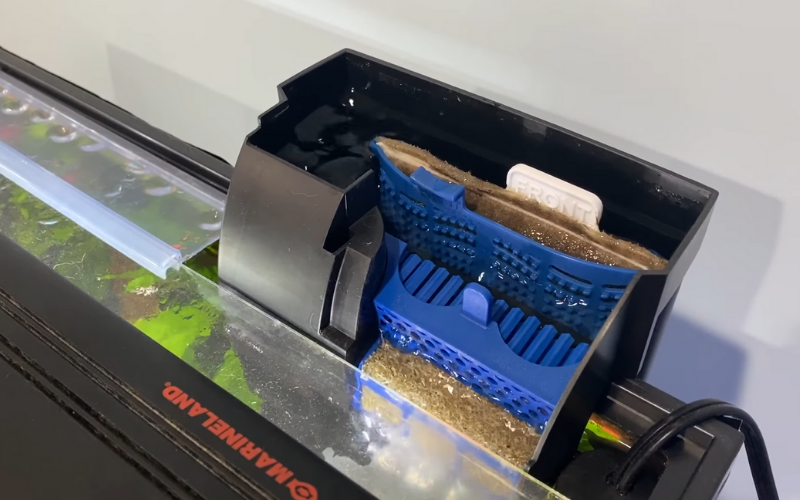
One of the major downsides of HOB filters is their noise.
Internal Box Filters
Internal Box filters are basically hanging on the back filters in Reverse. Instead of the filter mounting on the outside of the tank, it’s mounted on the inside. Normally internal box filters are also used in small aquariums.
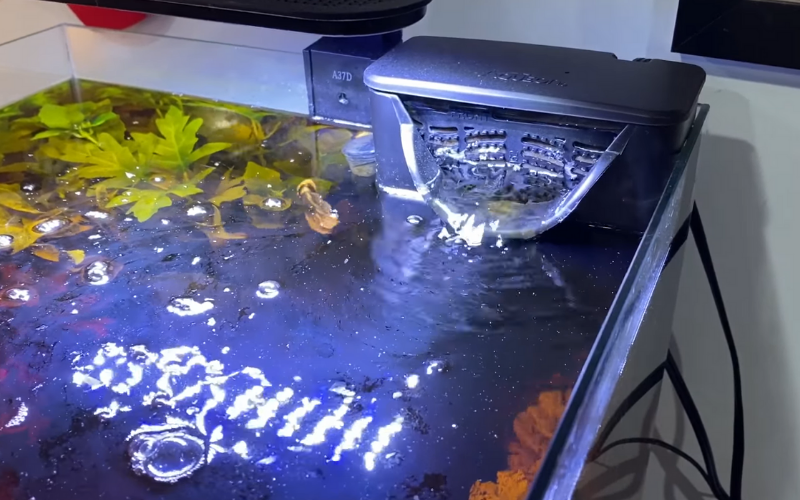
These filters do a great job filtering the water but take up quite a bit of room. So if you’re installing it into a smaller Nano tank, you might not want to sacrifice that valuable space.
Internal Power Filters
Internal power filters are exactly what they sound like. They are power filters that should place inside of your aquarium rather than hanging off the back as HOB Filters. These filters are great if you want to level up from sponge filters but don’t want to go for a hang-on-the-back filter.
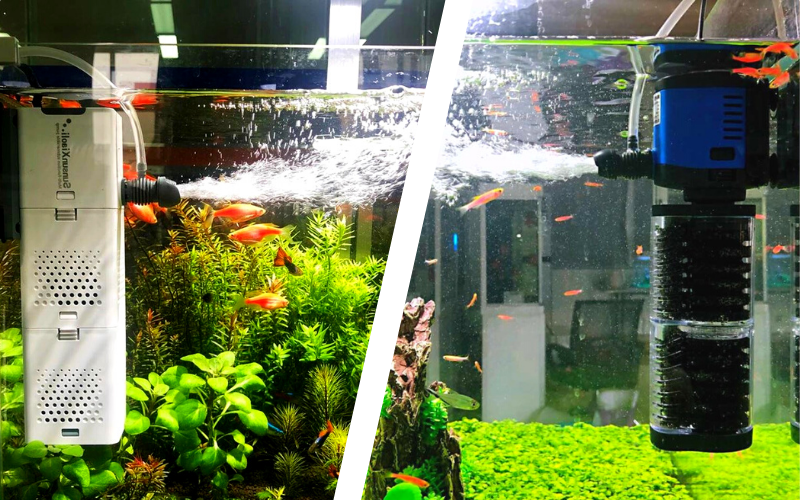
How to set up the internal Power Filters
The internal filter comes as a compact unit. So you just have to stick the filter inside the tank wall with its suction cups.
Maintenance
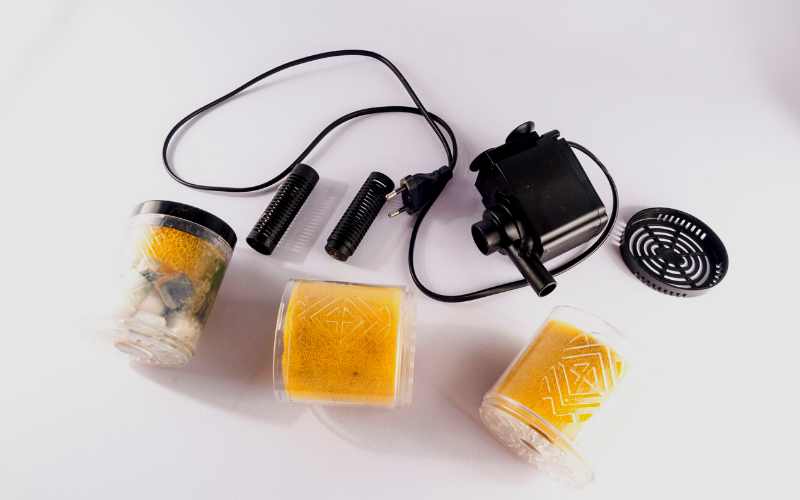
Maintaining an internal filter is super easy. All you need to do is separate the plastic cover and clean the filter media in it. Then just stick it right back in the tank.
Pros and Cons
As they are inside the tank, it works completely silent and avoids the risk of leaks. In fact, the biggest pro of the internal filters is their efficiency and low cost.
But the biggest con of the internal filters is that they take up valuable space inside the tank
Canister Filters
When you’re ready to upgrade your filter to an advanced filtration system, your first option will be a canister filter. Canister filters are usually used in larger tanks. Because they are able to process a ton of water very efficiently.
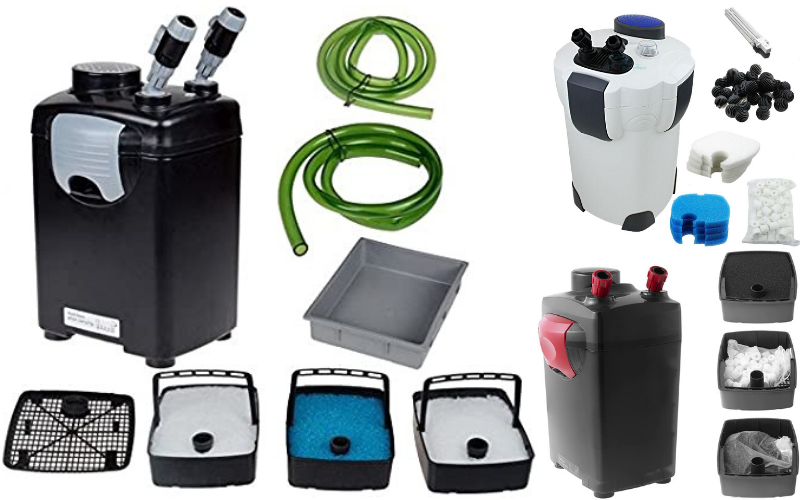
How to set up the Canister filters
Installing canister filters is much more technical than sponge filters or Hang On the Back Filters. But it’s not difficult and just follow the instructions given in the user manual.
One of the trickiest things that you’ve got to do with canisters is cutting the long piece of hose with the right size. Take your time with this as you’ve only got one shot at it. If you cut it too short, you will ruin it.
Canister filters are normally installed in the cabinets below the aquarium. They have an intake hose that usually mounts on the back wall of the tank and connects down to the canister intake.
Then the intake water is processed through the sponges and media, and filtered water will be sent back to the tank through the returned pipe. It’s similar to the process of the hang-on-back filters.
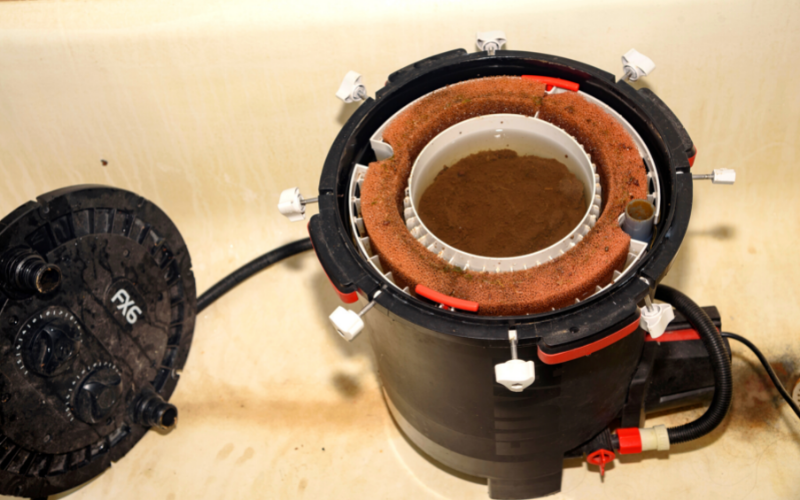
Maintenance
The maintenance of canister filters is somewhat more complicated than other filters. You have to separate the filter from the tank and take out the filter media for cleaning.
Some of the Canister filters are pretty heavy. It’s also pretty much impossible to get inside canisters without getting water everywhere. Fish experts recommend taking the filter outside the home before you open it up. If you have a smaller model at least put it in your sink or bathtub.
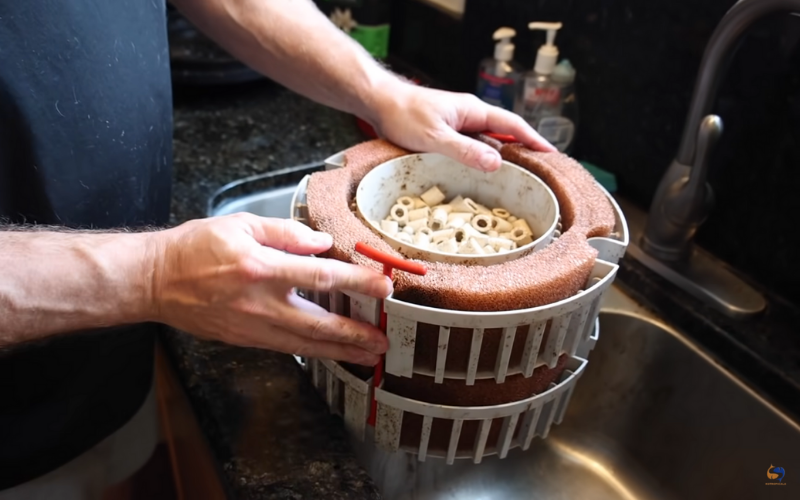
Some Canister filters come with a built-in backwash functionality. Then you can supply a pressurized water supply into the backwash inlet and clean the filter to a certain extent without separating.
Pros and Cons
The biggest benefit of canisters over Hang On the Back Filters is that they have enough room to install a variety of sponges and filter media. Also, with the large capacity and more powerful motors, canister filters are able to filter more water than smaller hang-on boxes.
The second pro is their super-quiet operation. Most of them are pretty much silent which makes them more suitable for public places.
When moving on to the cons, the first con is being somewhat complicated to install and maintain. So if you’re looking for something super easy, canisters might not be the right choice for you.
The next con is the cost. Canister filters are somewhat expensive. Most of them are going to be well over $100, which is like triple the cost of Hang On the Back Filters and ten times as much as a sponge filter.
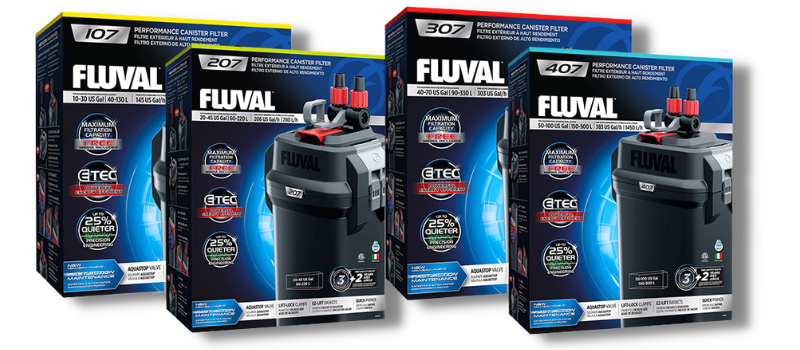
But overall canisters do a great job of processing a lot of water and doing it very quietly. Normally Fluval 7 Series Canister filters are good for small and medium-range aquariums.
If you’re a DIY hobbyist, you can set up your own DIY Canister Filter at home. Check these step-by-step video tutorials to get a basic idea.
Sump Filters
Sumps are the most advanced and versatile filtration system in the aquarium hobby. You can literally do anything you want with them. Normally sumps are used in large aquariums.
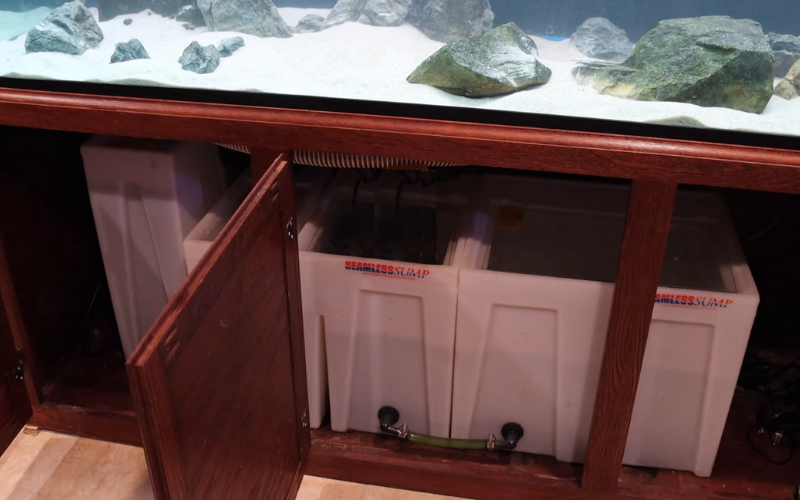
When it comes to the sump, there are two different approaches. The first is getting an already manufactured filter and just installing it. The other is making your own. That’s for the people who love DIY projects.
How to set up the Sump filters
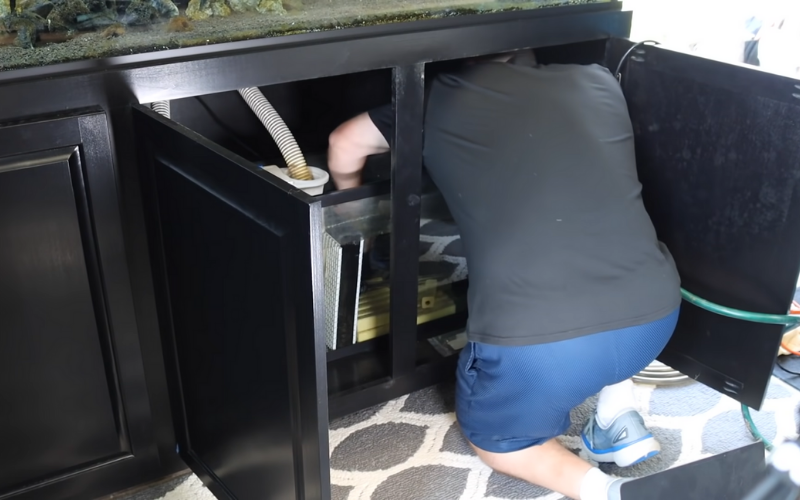
Normally Sumps are installed under the aquarium. The water is fed through the drain by gravity. There is a filter sock at the beginning to catch large mechanical debris.
Once it gets to the tank, it usually goes through a series of different compartments where it’ll flow through filter socks, sponges and bio media, and chemical media. Finally, water comes to the main sump, which has the heaters and the pumps that send the water back up to the tank.
Maintenance
When it comes to maintenance, it’s not the worst thing in the world. But it’s much more difficult than the others. Because you’ve got to disconnect those compartments and clean them. Similar to canisters, sumps are also pretty heavy. But actually, it’s not a big deal as you would not be required to clean your sump very frequently.
Some Sumps have a reserve tank which is a tub of water that the sump will pull from when the water evaporates. It is really nice. Because you don’t have to constantly top off the water between maintenance.
Pros and Cons
When it comes to the pros and cons of sumps, the biggest pros are going to be versatility and efficiency. These systems process a ton of water and the options are endless with what you can do with them.
One of the biggest advantages is that you can get your heaters out of your tank and get them hidden down below in the filter.
The first con of sumps is that they can be pretty much tricky to set up. Also, regardless of whether you buy a pre-made one or build your own, it will cost a significant amount of money.
Another problem is that there is more potential for leaks. Also, they will be somewhat noisy.
So finally, Sumps are amazing. They’re probably the most advanced, efficient, and versatile way of filtering an aquarium. But if you’re not good with DIY or problem-solving, this might be a filtration system that you want to stay away from, at least in the beginning.
Undergravel Filters
Undergravel filters went out of style a long time ago, but you can still see some of them out there. These filters are normally used in small and medium-range aquariums.
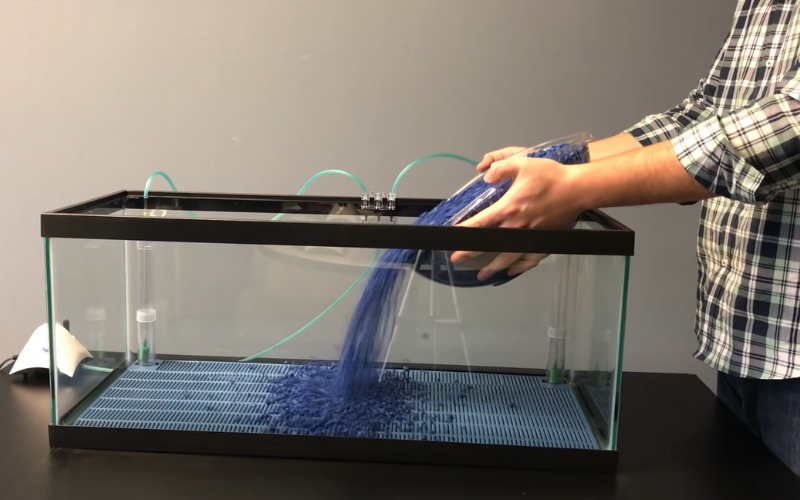
The concept is that there’s a tray installed under your tank substrate with a tube extending up the back corners. You install powerheads or an airline to the top of those tubes which draws water up the tube.
Then the water draws up through the tube and naturally pulls water down to that tray, trapping all of the debris on the bottom of the tank.
The main drawback of Under gravel filters is that they can get clogged up pretty easily. It depends on what kind of substrate you use. Also, it can be a little bit harder to maintain. You’d probably be best to just avoid them, especially if you’re a new fish keeper.
Final Word
The filter on your aquarium is the most critical piece of equipment to ensure you’re providing a healthy environment for your pets. So you should pick a filter that’s easy to install, easy to maintain, and does a good job of keeping your aquarium clean and healthy.
As mentioned above, you have 6 main types of aquarium filters. Consider what’s going to be involved in maintaining it, consider how it’s going to look in your tank, and think about the effect that it’s going to have on the ambiance in the room, like whether it is going to be noisy or not. Considering all these things, select the best-suited filter for your aquarium.


