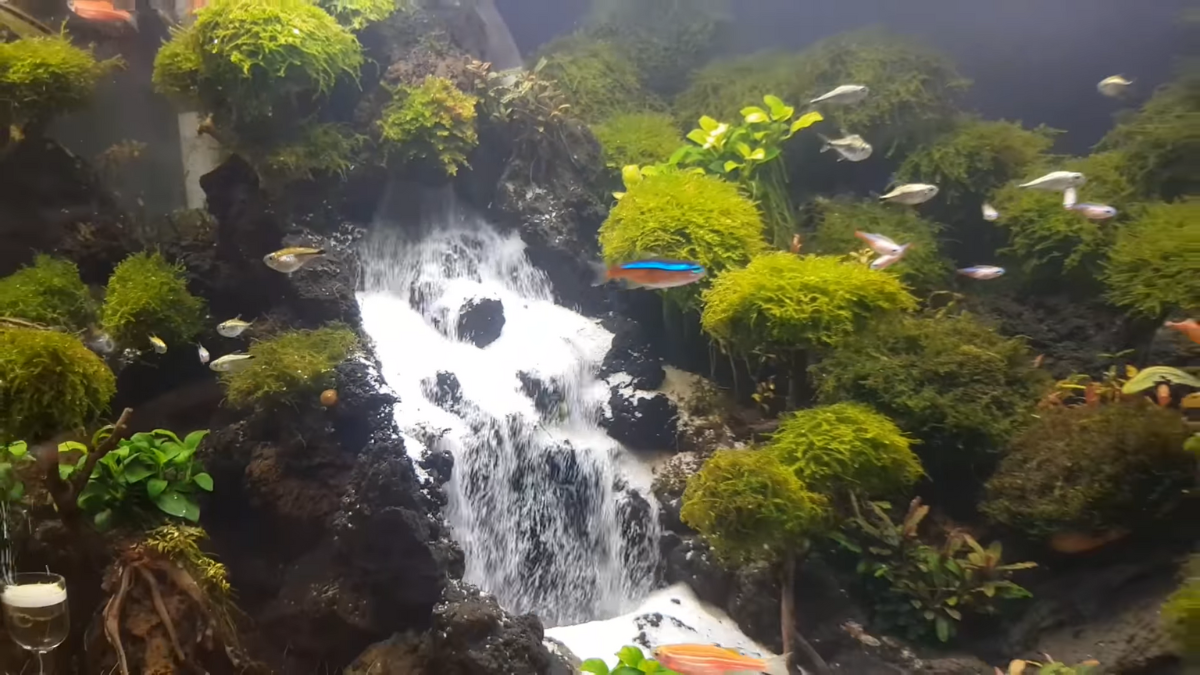
If you are into aqua scaping and fish tank decoration, you may have seen underwater sand waterfalls in aquariums and wondered how does it possible.
All it is essentially a waterfall underneath the water, and they are made of sand. In this DIY tutorial, we will talk about the sand to use, the type of flow you will need, and the materials you will need to build it.
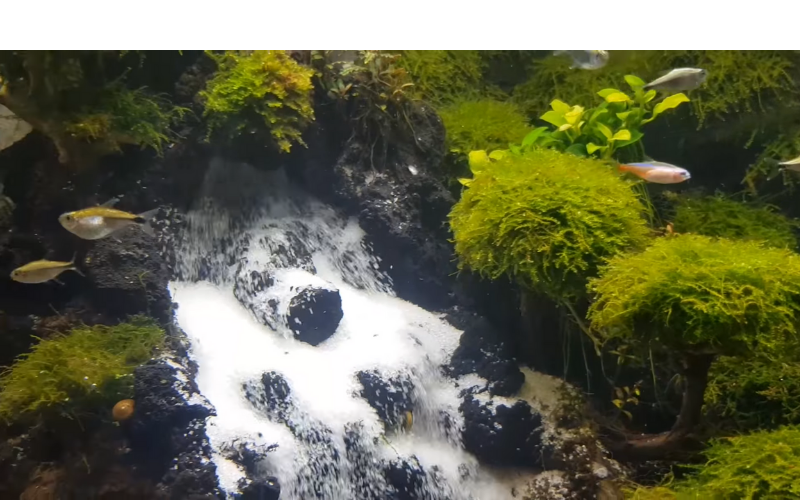
There are several different ways that you can build an underwater sand waterfall. In this guide, let’s discuss the most practical and cost-effective way of making an aquarium sand waterfall step by step.
So, let’s start by taking a look at the materials, and after that, we will find out how it actually works.
Material List for DIY Aquarium Sand Waterfall
The materials you will need for this project are straightforward and simple.
- PVC pipes (1 inch) – You can use more than one-inch diameter PVC pipe depending on the connection of your power head. If your powerhead supports more than one inch of PVC pipes, you can use them. You can also use transparent aquarium pipes too.
- PVC L joints – Depends on how you want to do your plumbing work.
- PVC T joint – For the pipes to be joined and the sand to be sucked in.
- Submersible Power Head – To pump water with suspended sand particles.
- Plastic Plate – To insert across the T joint.
- White Sand – When selecting sand for your underwater sand waterfall, get sand with average-sized particles. Too much fine sand can disperse everywhere, while coarser sand can get stuck in the pipes.
How to Setup a DIY Underwater Sand waterfall?
Step 01
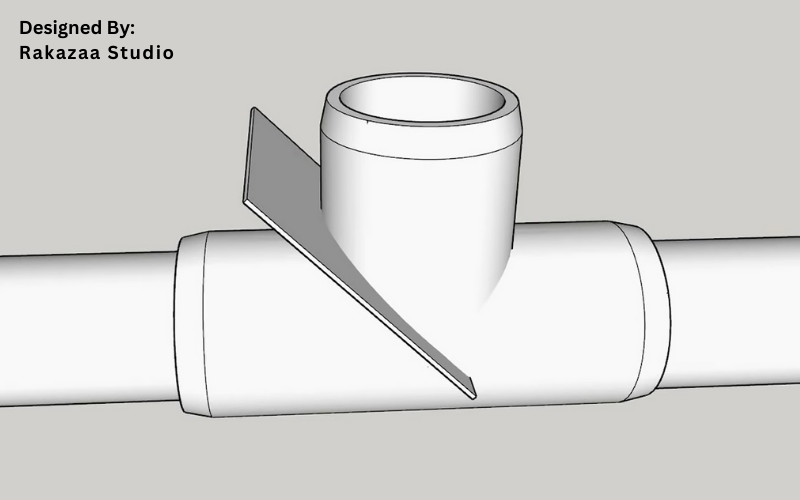
First, you have to make a slight modification to the T joint. You need to notch the T joint at 45 degrees using a cutter and insert the plastic plate. Instead of a plastic sheet, you can use any kind of thin plate from any material that can suit the purpose.
Cut the PVC plate into a small square piece and slide it through the notch. Then apply some silicone paste or hot glue to prevent any water leakage. So it gives a sort of airtight seal as well.
Step 02
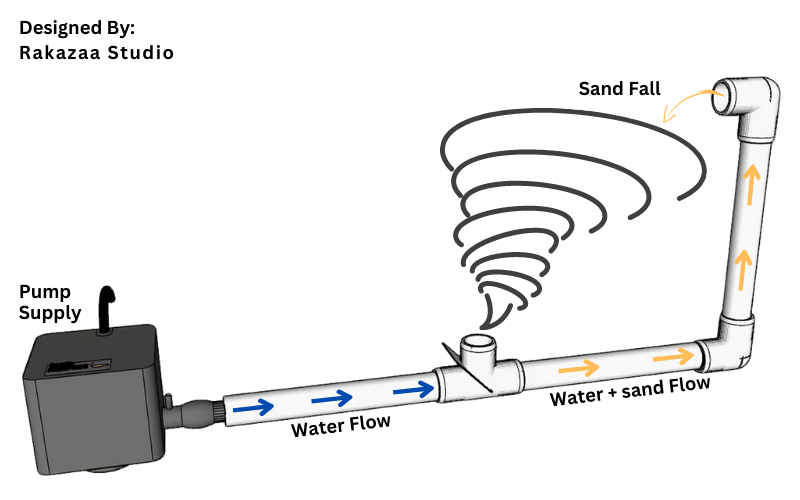
Next up, you can connect the L-joint and the power head as shown in the image.
Here we have shown the simplest version of this. So when modeling your DIY aquarium sand waterfall, you can be more creative with your setup.
You can design the piping work as per your requirement. But try not to make it too complicated because too many L joints will have residual sand settling in at the corners.
But you can modify the pump side of the pipe where the water is being streamed through because there’s no sand involved. You can mount the power head further away from the whole setup as it reduces the risk of sucking sand particles into the power head.
Let’s get into a detailed view. As you can see in the image, the plastic plate inserted at the T joint hitting more than half of the T joint space. It causes the water to jet stream to the pipe’s other side.
So when the power head blows water from one end of the pipe, it gets jet streamed to the other end and pushes the sand towards the water flow direction. So the sand will never go back to the direction where the power head is, and your impeller will not get affected.
Likewise, the sand falls from the upper end of the pipe where the waterfall starts and then collects back into the pipe from the T joint. Then again, the stream of water causes a jet stream effect, pushing the sand up.
So it becomes a cycle, it pushes the sand, and the sand falls back. So this is a loop function, and this modified T joint comes into action. Actually, it allows sand to collect and slide through the pipe to complete the cycle. Without this plastic slate, the water will just flow without pushing the sand.
Step 03
Step three is to build the sand container. All the sand that falls from the waterfall should fall into this area. This container will just act like a sort of a catchment area for the sand to prevent it from going anywhere else.
Actually, it`s better to make this container as a funnel that can direct all the sand into the T-joint sand inlet. So you can use any sort of creative mind of how you want to build and decorate the catchment area of your DIY sand waterfall.
Some people make this catchment area by modifying plastic funnels, and some use cement structures.
Step 04
The final step is to build some sort of decoration to cover the pipes and the pump. You can use some artificial rocks formed using Styrform or natural larva rocks that we use for aquarium decoration.
Here is a Complete Step by Step Video Tutorial by Rakazaa Studio to build your DIY underwater sand waterfall.
Can you use an Air Stone Instead of the Power Head of the Sand Waterfall?
You may have seen some sand waterfalls in aquariums; air bubbles emerge from the waterfall with the sand. That is because those waterfalls have followed the traditional method of using an air stone instead of a power head.
By replacing power heads, you can save some amount of money. But if you make a bigger waterfall, a water stream powered by an air stone will not be enough to push the sand through the waterfall.
Here is a DIY tutorial on how you can set up an underwater sand waterfall with an airstone.
Does Sand go through the Power Head?
Here the power head doesn`t suck up the sand directly through the impeller and pushed out through the pipes. What it does is, form a water current through the pipe that can push the sand up to the waterfall. So there is no contact between sand and the power head.
Aquarium Sand Waterfall Kit
If you are a little lazy, there are readymade aquarium sand fall kits that you can simply place in your fish tank. There are several waterfall designs that you can select from.
You can purchase these aquarium sand waterfall kits from Amazon. They come with all the required parts, including a power head, waterfall structure, and pipes.

But we recommend you to build your own aquarium sand waterfall by following this DIY tutorial because it`s just simple, and you customize your project as your own.
Final Words
So this is how you can set up a DIY underwater sand waterfall for your aquarium. Please feel free to ask any questions you have, and check our DIY aquarium guide for more DIY projects.

